New Google Maps rules from June 2018 and big changes to the way they allow the use of their API. The most important change is that you must add a credit card to their API. Besides that, there are also specific limits for free use.
Please check these related articles – https://mapsplatform.googleblog.com/2018/05/introducing-google-maps-platform.html – https://cloud.google.com/maps-platform/pricing/sheet/ in case you haven’t already heard.
It is also worth noting that we also provide an alternative solution (OpenStreetMap – https://www.openstreetmap.org ) if someone does not want to link a credit card in the Google API Console and use Google Maps.
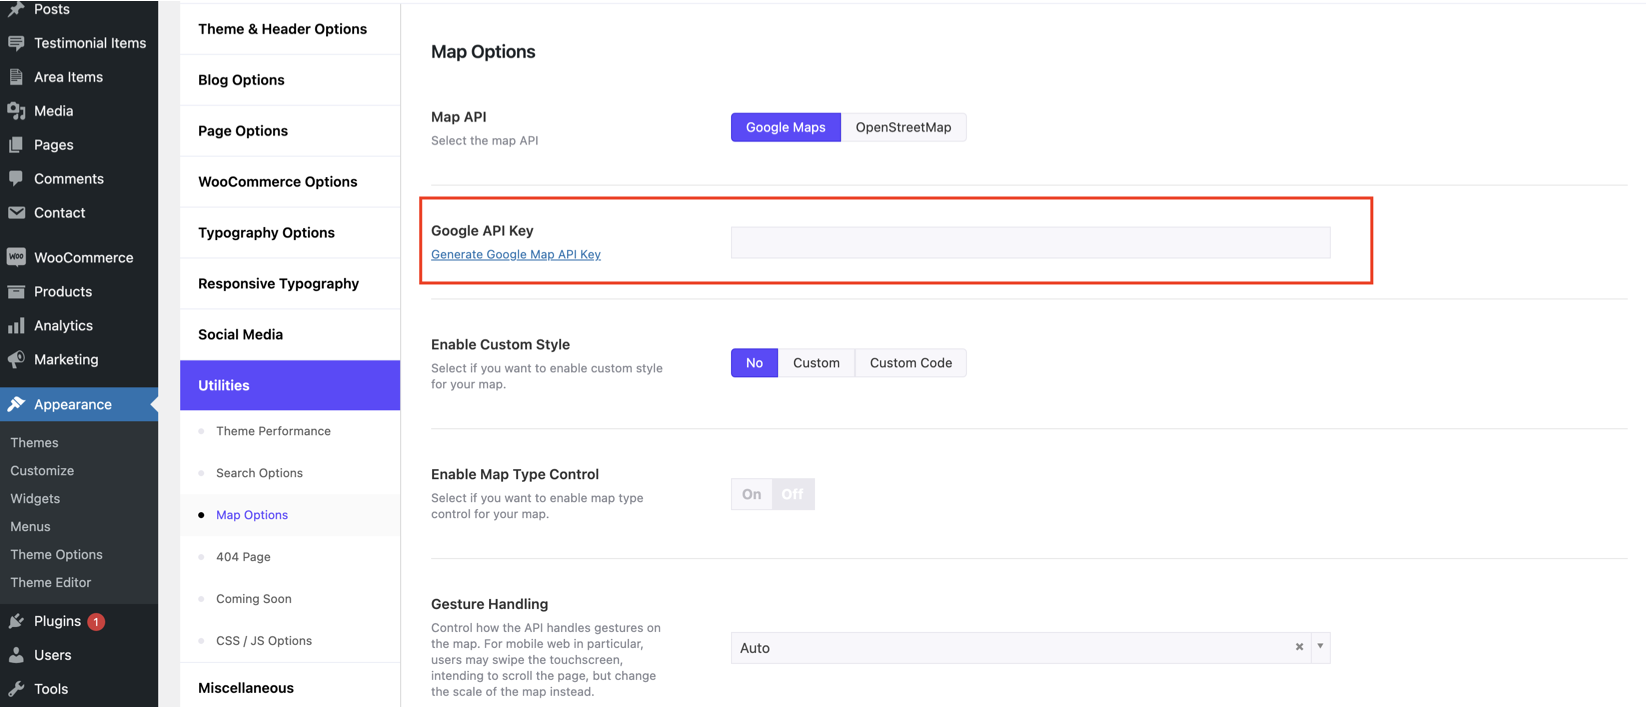
Where to place the Google API Key in WeShop.
From June 22th 2016 Google requires you to use an API KEY to display the maps you need on your website.
So please:
- Generate an API key from https://developers.google.com/maps/documentation/javascript/get-api-key by following the detailed instructions by Google.
- Place your API key in the related field in Theme Options > Utilities > Map Options.
- You are ready!
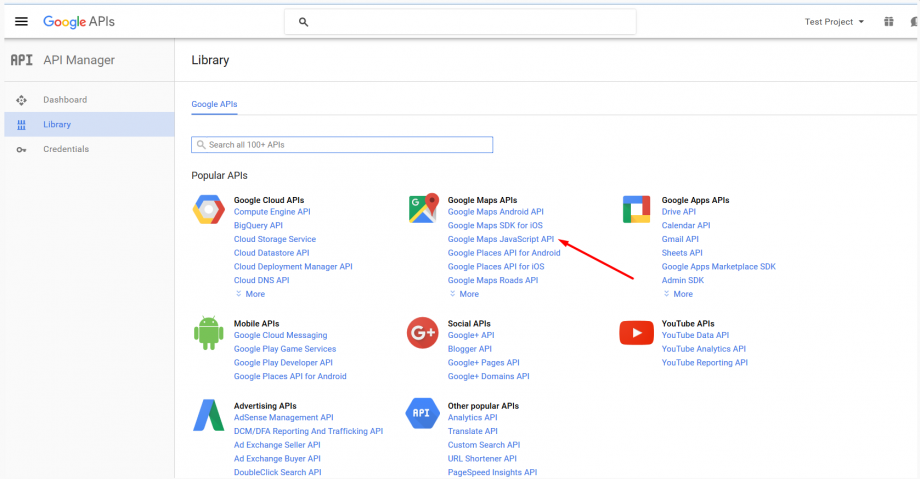
NOTE: You need a browser API key and enable the Google Maps JavaScript API in the API library. Don’t add any domain restrictions in this API key for your tests.
Custom style for your Google Maps.
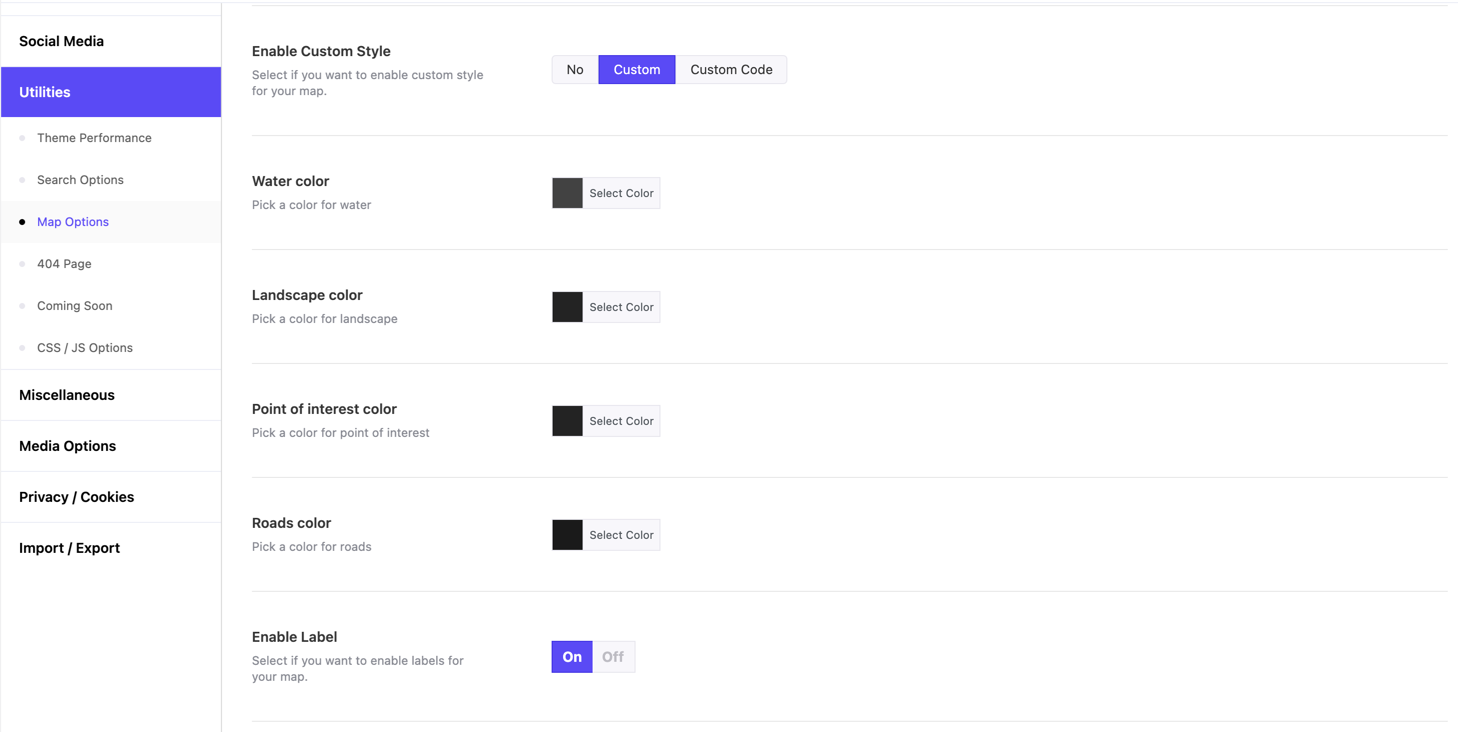
WeShop provides 2 different ways to customize your Google maps as you wish. Firstly, after enabling the Custom Style you can see quite a few options to style your maps.
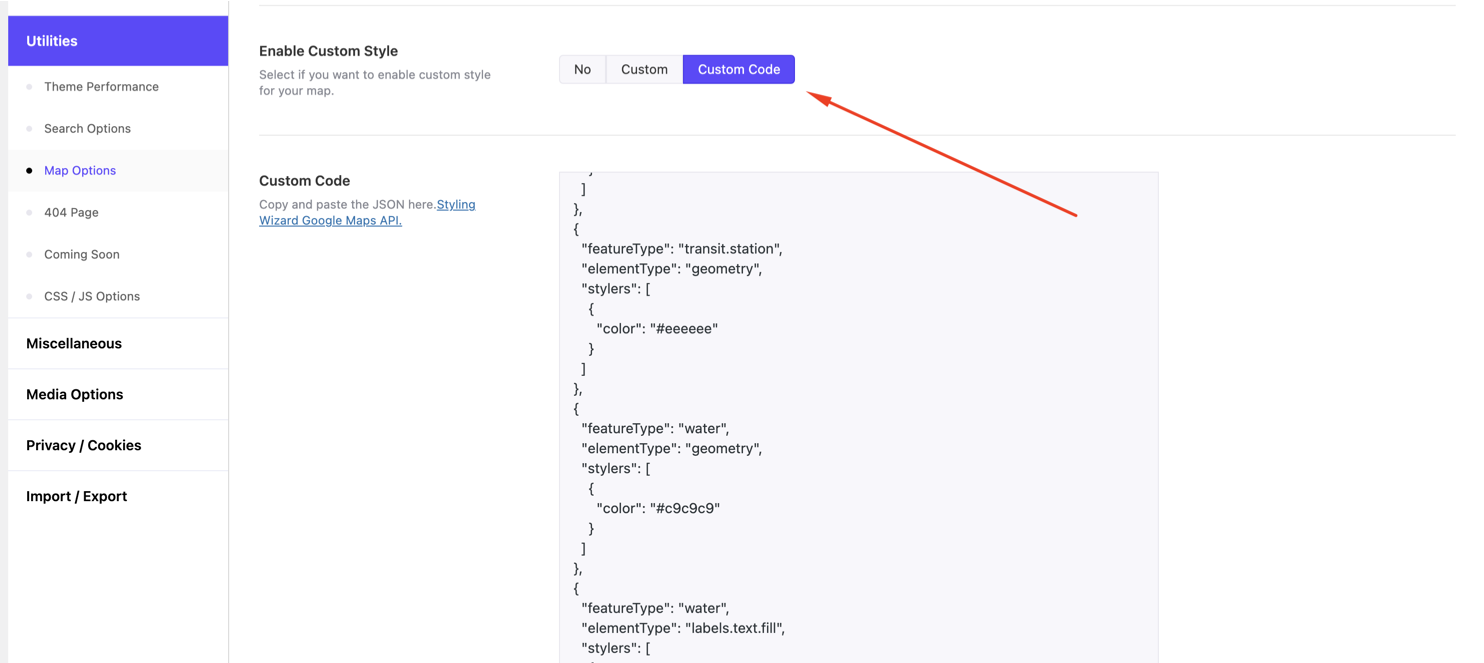
Additionally, you can style every detail on your maps by creating your JSON file – Styling Wizard Google Maps API. You can just paste it under Custom Code field.


